Viewpoint Vista Authentication
To authorize access to read and write data between your product and Viewpoint Vista using Agave, you or your customer will need to complete the following steps:
Step 1: Whitelist Static IP Addresses
Step 1A: Hosted or Cloud Versions of Viewpoint Vista
If you are using a hosted (cloud) version of Viewpoint Vista, you will need to open a case with Viewpoint Customer Support to add Agave's static IP addresses to your Vista TLS Database Endpoint IP whitelist:
-
Log in to your Customer Support account.
-
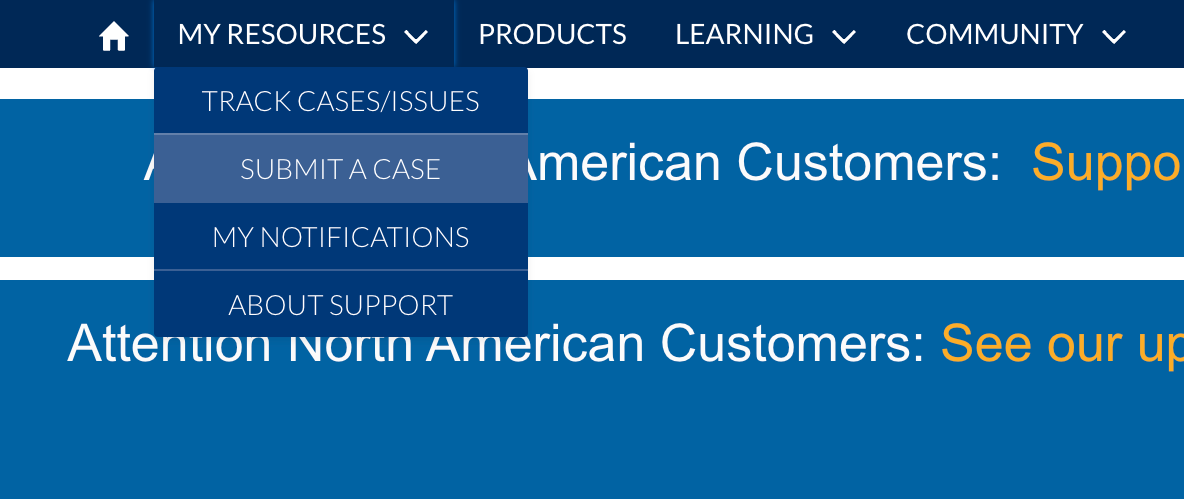
Select My Resources, then Submit a Case.
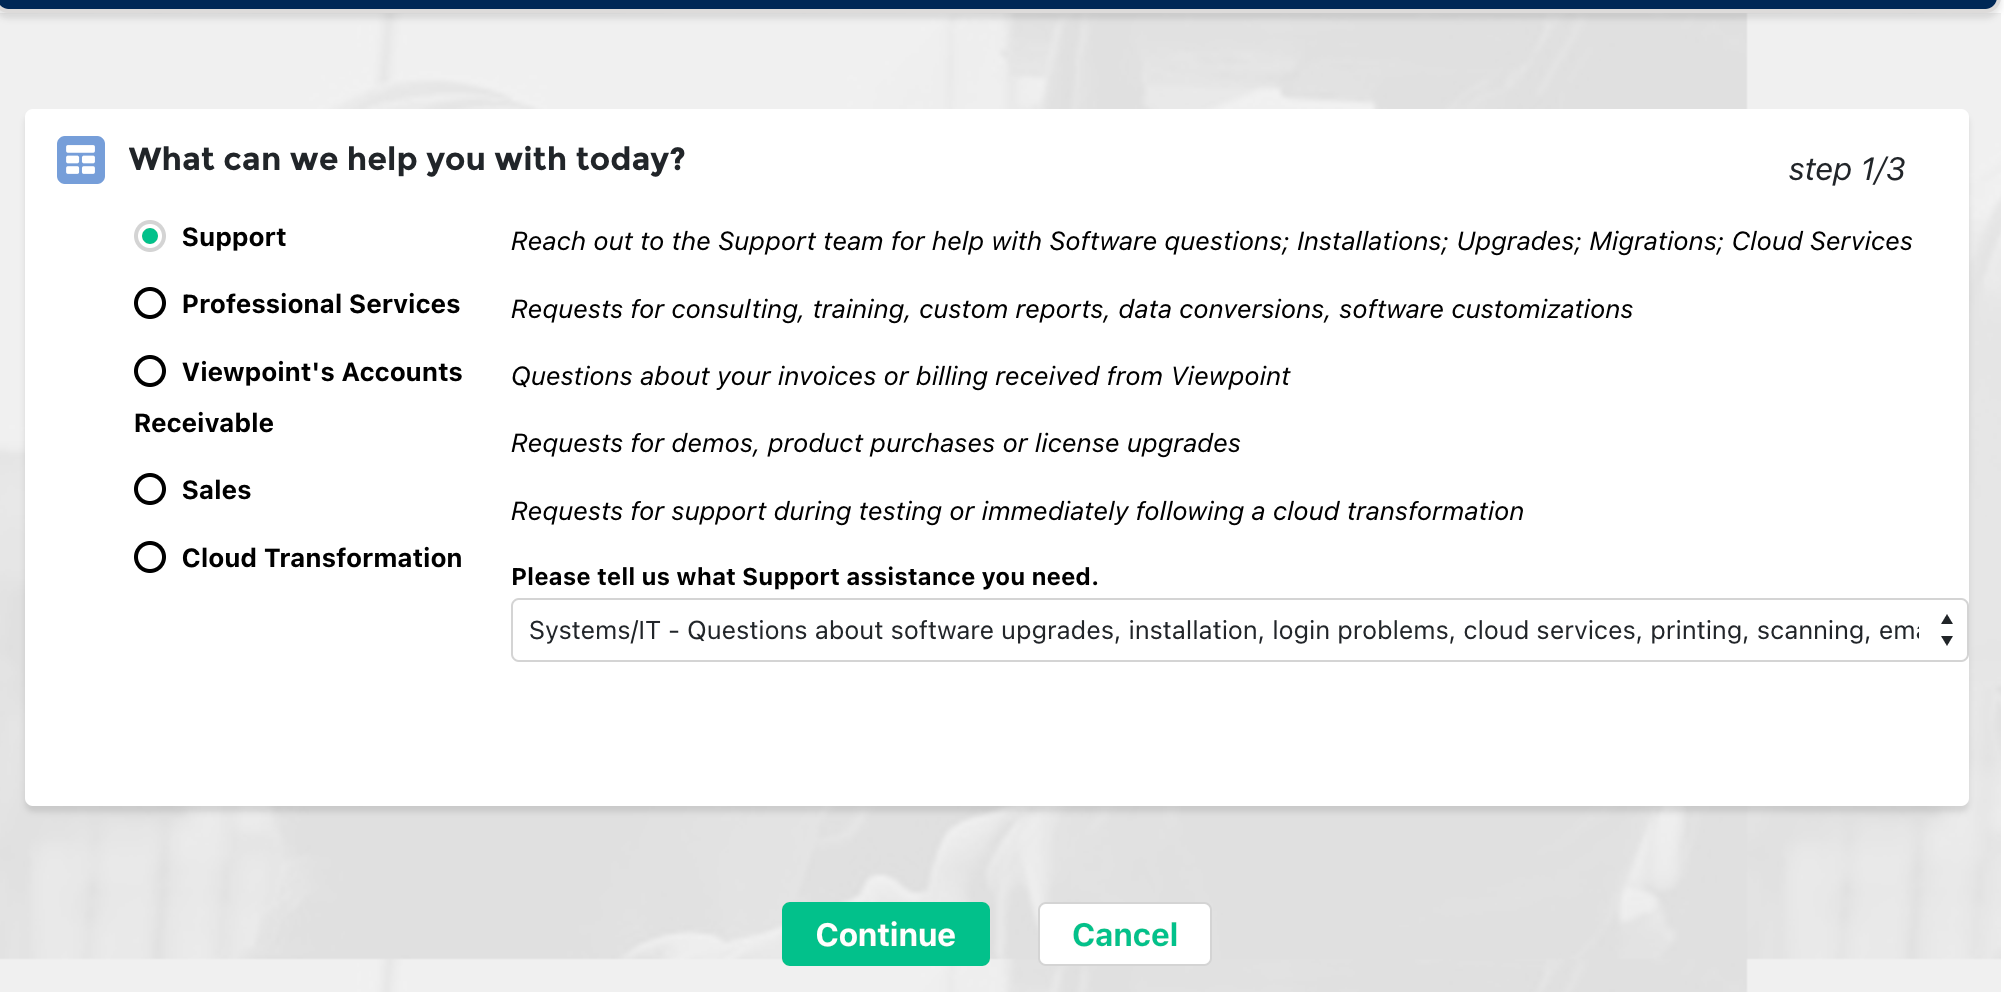
- Select Support, then Systems/IT.
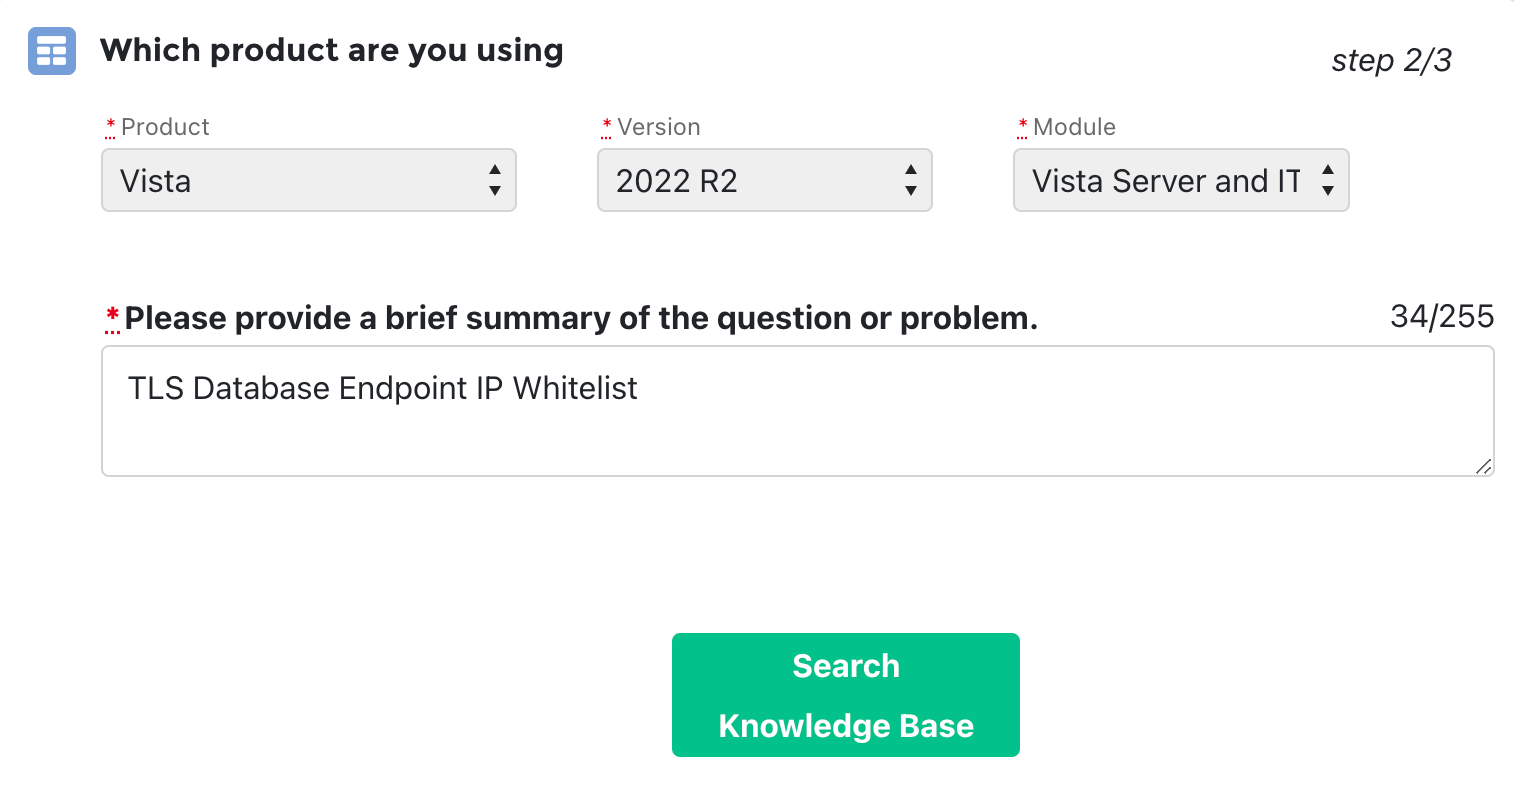
- Under Which product are you using?, input the following and select Search Knowledge Base:
- Product: select "Vista".
- Version: select the version of your Vista instance (e.g. 2022 R2).
- Module: select "Vista Server and IT Related".
- Brief Summary: input "TLS Database Endpoint IP Whitelist".
-
Scroll to the bottom of the page and press Continue to Case Creation.
-
Under Case Create, select a Priority. Under Description, add the following:
Hi - we are looking to whitelist our IPs for TLS Database Endpoint connectivity with our Vista instance. Here are our static IPs:
- 13.58.14.240
- 18.219.160.98
- 3.143.37.24
Could you also let us know what the database name and port are for our instance?
-
Press Submit.
-
After submitting a case, you should receive a response from Viewpoint Support within 24-48 hours confirming the connection the IP addresses have been whitelisted. Make a note of the hostname (e.g. {hostname}-sql.viewpointdata.cloud) and port number since you will need to use these to authenticate with Agave Link)
Step 1B: On-premise Versions of Viewpoint Vista
if you are on an on-premise version of Viewpoint Vista, you will need the following three static IP addresses to connect to your SQL server by adding them to your firewall for your network:
- 13.58.14.240
- 18.219.160.98
- 3.143.37.24
If you run are unable to authenticate with Agave Link even after adding the above static IP addresses, we recommend following our guide on troubleshooting common issues with on-premise connections.
Step 2: Create a SQL User
After adding Agave to address your Vista TLS Database Endpoint IP whitelist, you will need to create a SQL User to be able to read and write data from and to your Vista Server:
If you do not have access to Microsoft SQL Server Management Studio, we recommend following Trimble's guide on creating SQL accounts within Viewpoint Vista.
-
Open Microsoft SQL Management Studio and log in to your Vista SQL Server.
-
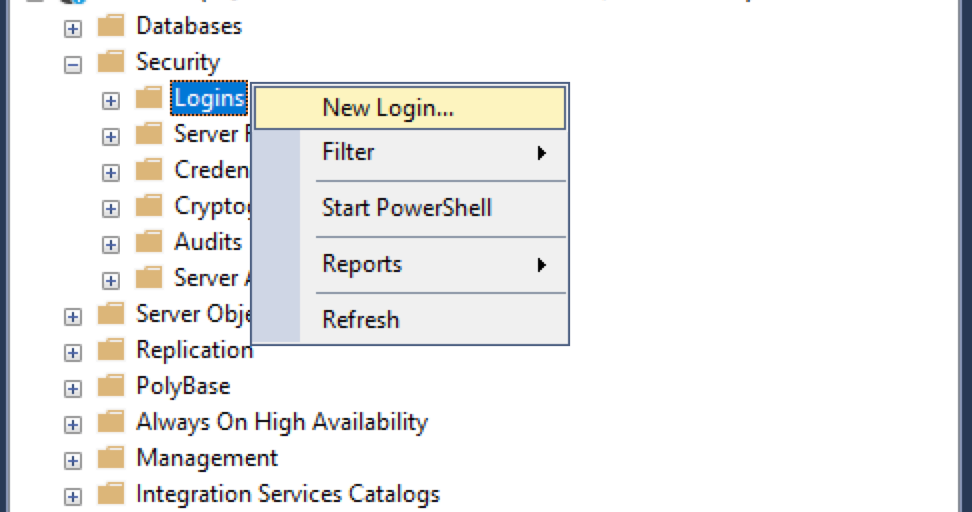
Select Security, right click Logins, then select New Login....
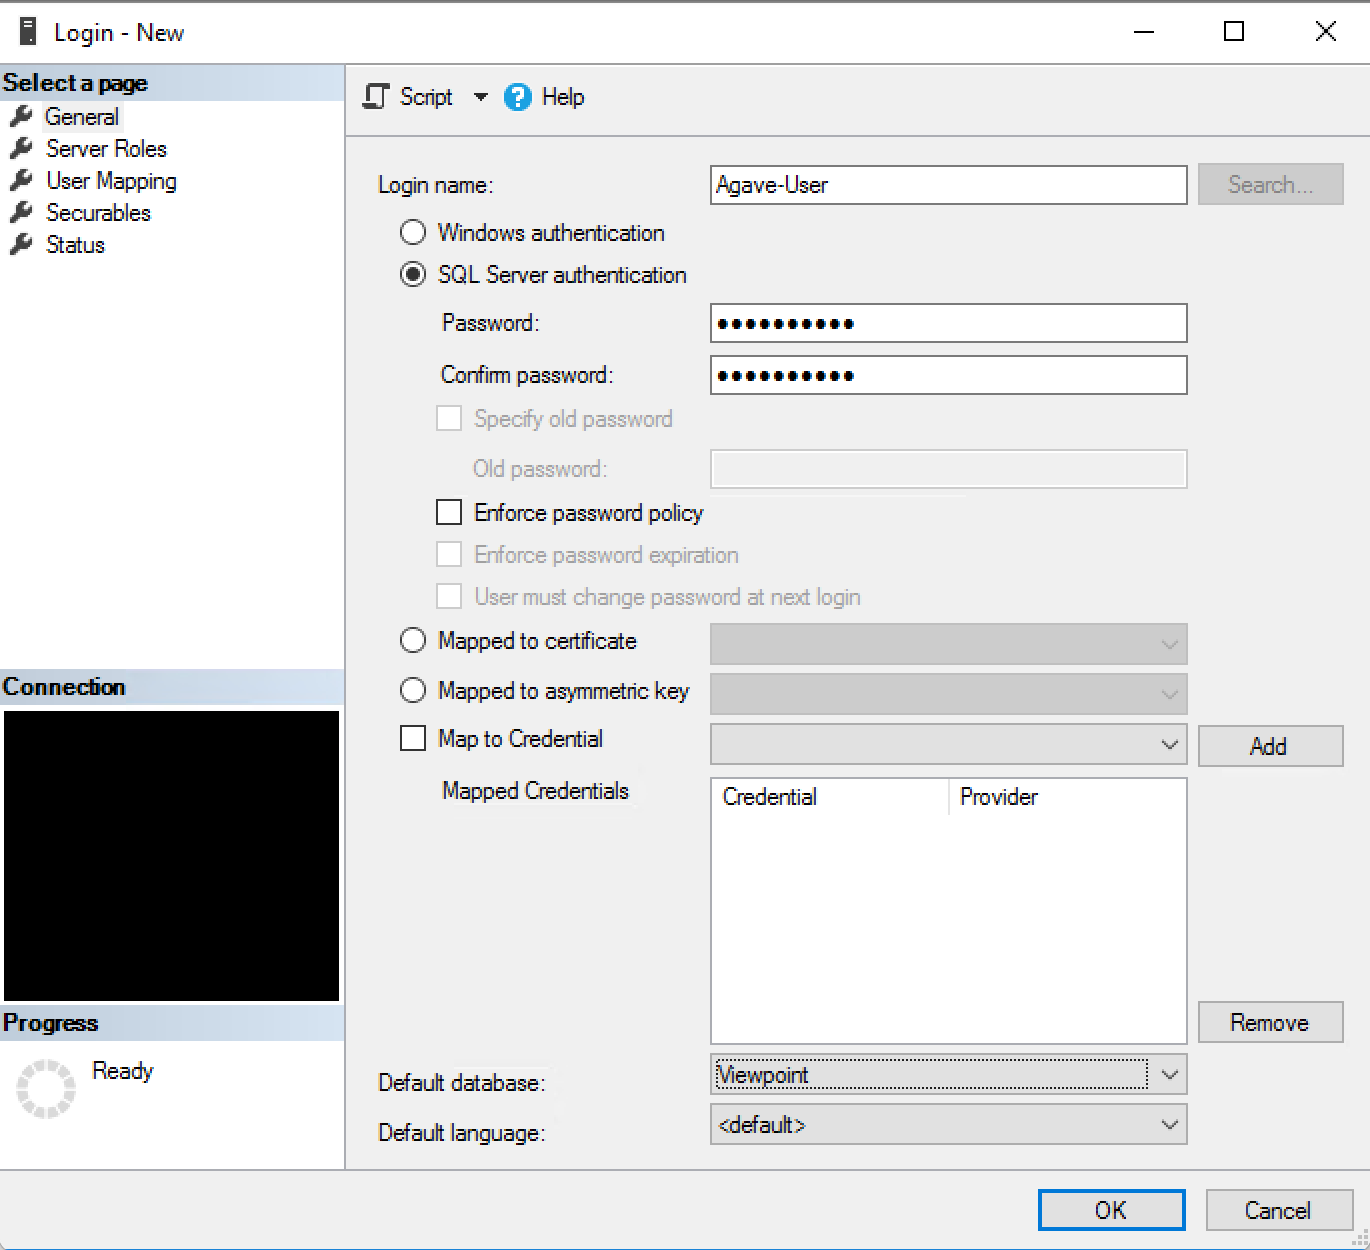
- Under General:
- Input a new Login name (e.g. "{your product name}-User").
- Select SQL Server authentication.
- Add details for a password.
- Unselect Enforce password policy.
- Set Default database to be "Viewpoint".
Your password must meet the following criteria:
- Be at least 8 characters long
- Contain at least one letter, one number, and one special character (e.g. !, @, #, $, etc.)
- Not be part of an online data leak
- We use Have I Been Pwned to securely check your password, without sending your actual password to their servers. See here for more information.
- Under User Mapping:
- In the Database column select "Viewpoint"
- Select the following under Database role membership for Viewpoint:
- db_datareader
- db_datawriter
- public
- VCSUsers
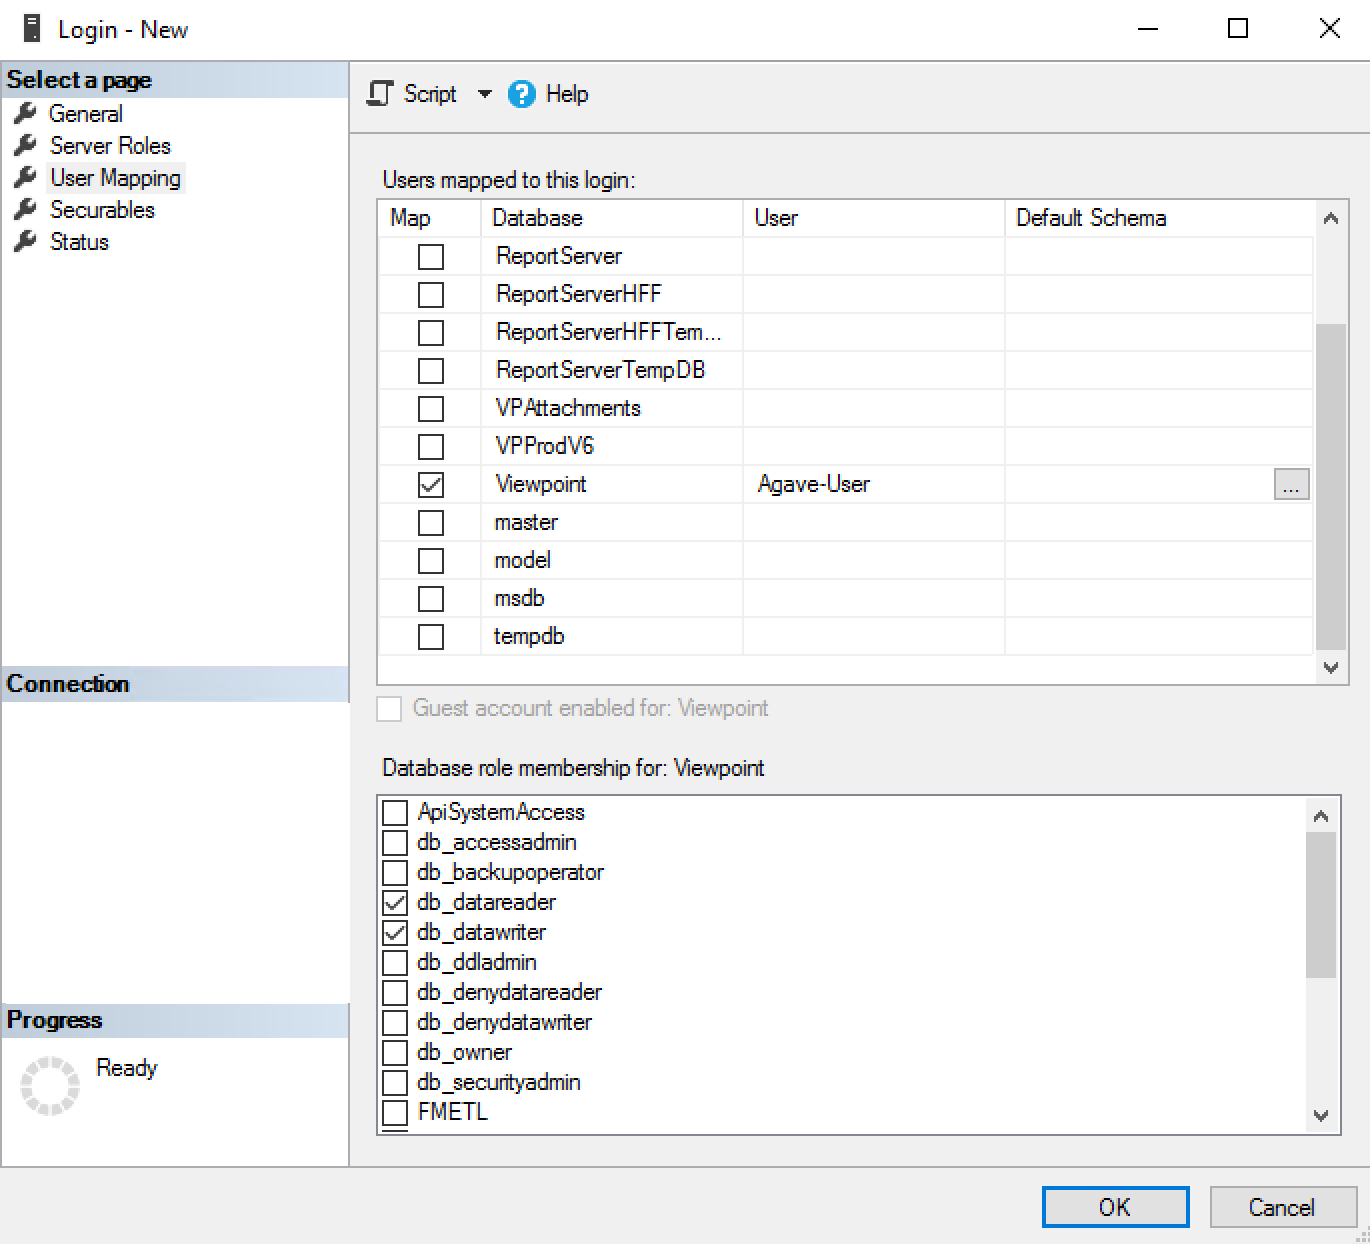
- Select OK.
Step 3: Authenticate with Agave Link
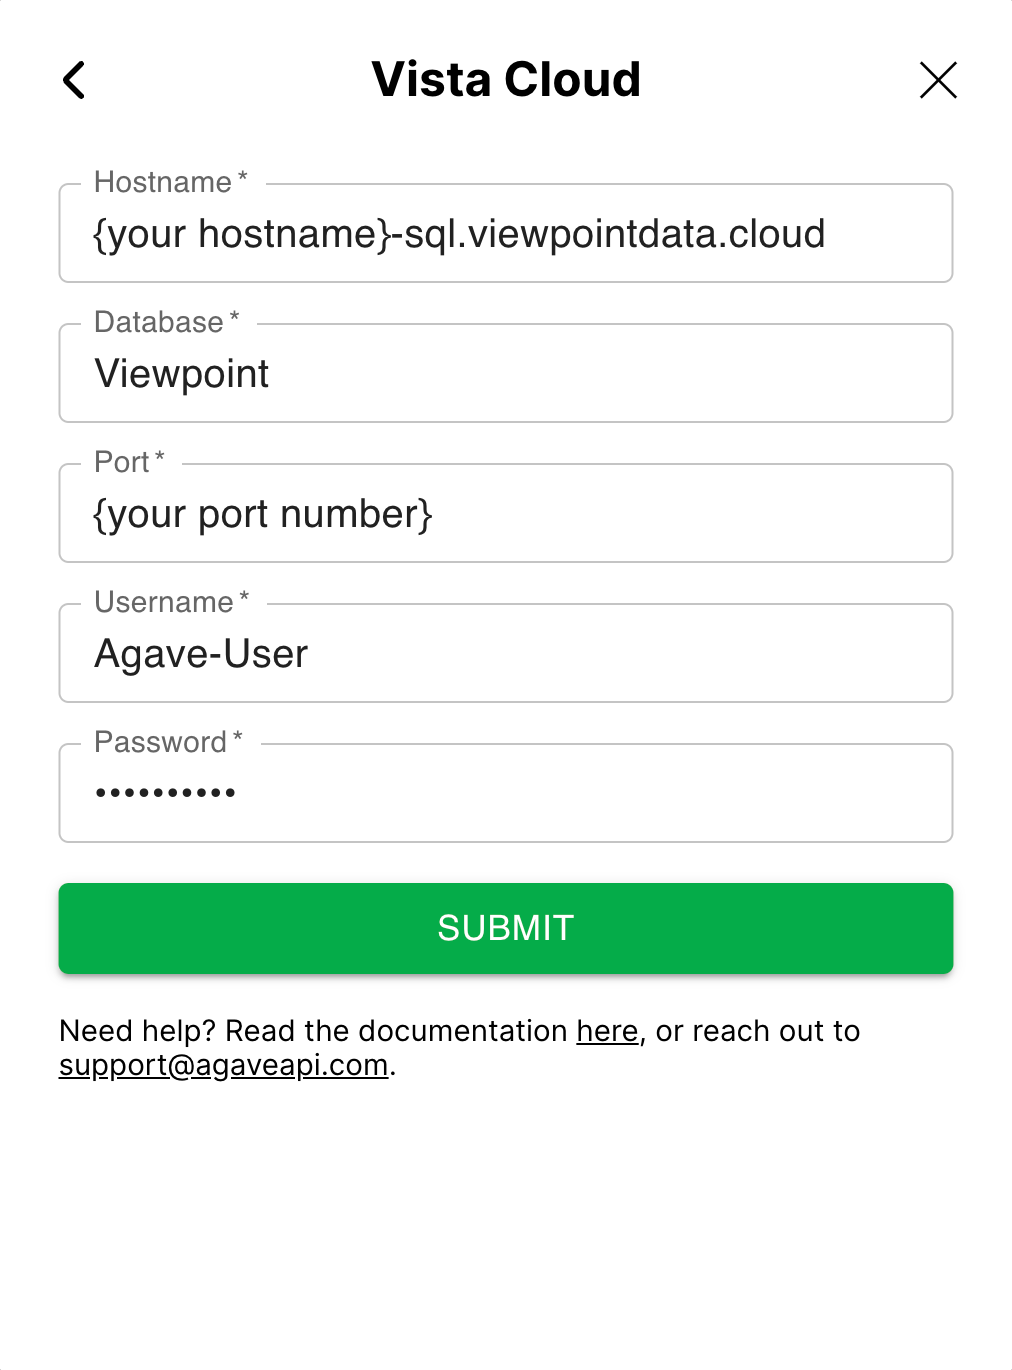
You can now authenticate using the SQL user and details about your Vista account using Agave Link. To authenticate, you will need to pass the following components:
- Hostname: this is the value for hostname that was provided in response to the case you filed (see step 9 of Open a Case with Viewpoint Support).
- Database: this is the name of the database you would like to grant read and write access to (e.g. "Viewpoint").
- Port: this is the value for port that was provided in response to the case you filed (see step 9 of Open a Case with Viewpoint Support).
- Username and Password: this is the login name and password from when you created a SQL user (see step 2 of Create a SQL User).